Image Sharpening vTool#
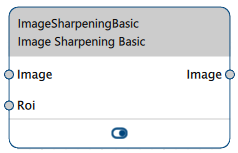
The Image Sharpening vTool accepts an image via the Image input pin and outputs the filtered image via the Image output pin.
If you use the ROI Creator vTool to specify a region of interest before enhancing, the Image Sharpening vTool accepts the ROI data via its Roi input pin. In that case, only the region of interest is sharpened which results in faster processing.

Image Sharpening vTool Versions#
Two versions of the Image Sharpening vTool are available. The following table shows the differences between the versions. Click a version in the table heading to jump directly to the relevant section in this topic.
| Starter | Basic | |
|---|---|---|
| How many sharpening operations are available? | 2 Sharpening Filter Unsharp Mask | 1 |
| Valid data types for Roi input pin | RectangleF | RectangleF, RectangleF Array, Region, Region Array |
Image Sharpening Starter#
How It Works#
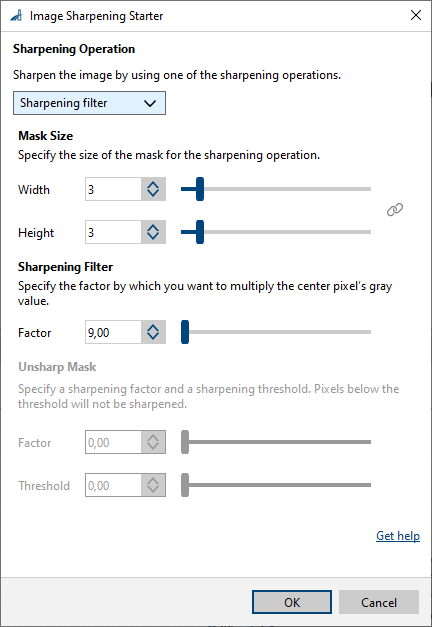
The Image Sharpening Starter vTool offers two solutions for sharpening the image.
Sharpening Filter#
The sharpening filter uses a square mask. The center pixel of that mask is multiplied by the sharpening factor. All other pixels of the mask are multiplied by -1. For mask sizes greater than 9, the border pixels of the image are excluded from the sharpening operation.
Choose the size of the filter mask according to the specific purpose of your application. Even filter mask sizes will be increased to the next uneven values. The maximum mask size is 25 x 25.
Specify the desired sharpening factor. This determines the amount of amplification. The minimum sharpening factor is calculated based on the width and height of the mask. You can increase it if desired.
Unsharp Mask#
The original image is filtered using a smoothing filter. Then, the filtered image is subtracted from the original image. Pixels with gray values above the threshold specified are multiplied by the sharpening factor.
Choose the size of the filter mask according to the specific purpose of your application. Even filter mask sizes will be increased to the next uneven values. To create square masks, you can link the Width and Height options. To do this, click the chain icon:
- Options linked:
- Options unlinked:
Also, you can specify the desired sharpening factor and sharpening threshold. The sharpening factor determines the amount of amplification. Only pixels with gray values above the threshold will be amplified.
Configuring the vTool#
To configure the Image Sharpening Starter vTool:

- In the Recipe Management pane in the vTool Settings area, click Open Settings or double-click the vTool.
The Image Sharpening Starter dialog opens. - Select the desired Sharpening Operation.
- Specify the Width and Height of the filter mask.
- Specify the desired sharpening factor.
- If you have selected the Unsharp mask operation, specify the sharpening threshold.
You can view the result of the sharpening in a pin data view.
Image Sharpening Basic#
How It Works#
A sharpening filter amplifies high frequency structures of an image like edges or lines.
The Image Sharpening Basic vTool compares a mean image, computed from the original image, to the original image. The differences between these two images are then amplified and added to the original image. The formula is:
Image_out = ( Image_in - mean_filter(Image_in) ) * Factor + Image_in
The strength of the sharpening is determined by the sharpening factor.
The filter mask size defines the cut-off frequency of the filter. Smaller filter masks will amplify only higher frequency structures of the image.
Mask Shapes#
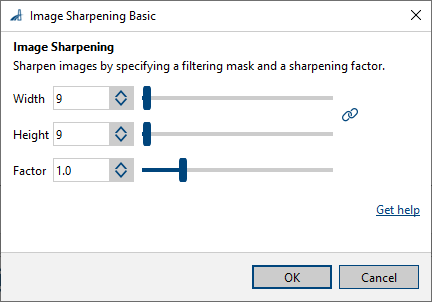
Image Sharpening uses a rectangular filter mask. Choose the size of the filter mask according to the specific purpose of your application.
Only odd width and height values are allowed. Even mask sizes will automatically be increased to the next uneven values.
To create square masks, you can link the Width and Height options. To do this, click the chain icon:
- Options linked:
- Options unlinked:
Sharpening Factor#
Specify the desired sharpening factor. This determines the amount of amplification.
Configuring the vTool#
To configure the Image Sharpening Basic vTool:

- In the Recipe Management pane in the vTool Settings area, click Open Settings or double-click the vTool.
The Image Sharpening Basic dialog opens. - Specify the Width and Height of the filter mask.
- Specify the desired sharpening Factor.
You can view the result of the sharpening in a pin data view.
Inputs#
Image#
Accepts images directly from a Camera vTool or from a vTool that outputs images, e.g., the Image Format Converter vTool.
- Data type: Image
- Image format: 8-bit to 16-bit mono or color images (see Supported Pixel Formats)
Roi#
Accepts a region of interest from the ROI Creator vTool or any other vTool that outputs regions or rectangles. Multiple rectangles or regions are merged internally to form a single region of interest.
- Data type: RectangleF, RectangleF Array, Region, Region Array
Outputs#
Image#
Returns the filtered image. The output image can be used by any vTool accepting images as input.
- Data type: Image
- Image format: Color or mono images (see Supported Pixel Formats)
Supported Pixel Formats#
Depending on the pixel format of the input image, the Image Sharpening Basic vTool outputs the following pixel formats (supported pixel formats for the Starter are to be confirmed at a later stage):
| Input Pixel Format | Output Pixel Format |
|---|---|
| Bayer GR 8 | RGB 8 Planar |
| Bayer GR 16 | RGB 16 Planar |
| Bayer RG 8 | RGB 8 Planar |
| BGRA 8 Packed | RGB 8 Planar |
| BGR 8 Packed | RGB 8 Planar |
| Mono 8 | Mono 8 |
| Mono 10 | Mono 10 |
| Mono 12 | Mono 12 |
| Mono 16 | Mono 16 |
| RGB 8 Packed | RGB 8 Planar |
| RGB 16 Packed | RGB 16 Planar |
| RGB 8 Planar | RGB 8 Planar |
| RGB 16 Planar | RGB 16 Planar |