Sharpness Indicator#
How It Works#
The Sharpness Indicator measures the sharpness in a section of the current image. This section is called the Sharpness ROI. You can adjust its size and position as desired.
To measure the sharpness, the Sharpness Indicator evaluates the edges in the image. An edge is perceived as sharp if there is a strong contrast in color or brightness or both. As a rule of thumb, a well-focused image has more sharp edges.
For best results when you're using the Sharpness Indicator to focus your camera lens, use a test chart rich in contrast, e.g., the ISO 12233 test chart.
Using the Sharpness Indicator to Focus a Lens#
To open or close the Sharpness Indicator pane, click the Sharpness Indicator icon in the toolbar:
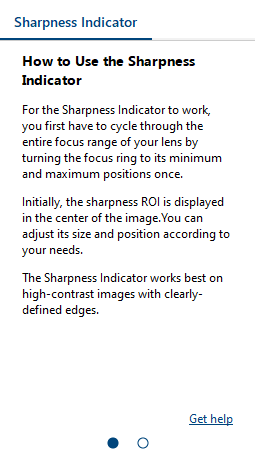
The first page of the Sharpness Indicator opens:

To focus your lens:
- Set up the camera in your environment.
Ideally, use a test chart with high contrast and clearly-defined edges. The distance to the camera should be about the same as your intended target object/scene. Lighting conditions should also be similar as during actual working conditions. - Open the Sharpness Indicator pane.
- Open the camera and start continuous image acquisition.
An image pane opens with the sharpness ROI displayed in the center of the image. - Optional: Adjust the sharpness ROI if required.
If you're not using a test chart but your actual target object/scene, you may want to focus on a particular area of the image or you may need a larger or smaller sharpness ROI.
To return to the sharpness ROI to its original settings, right-click the image and then click Reset Sharpness ROI to Default. - Turn the focus ring of your lens to its minimum and maximum positions once.
You will notice how the display in the Sharpness Indicator pane changes. - Slowly turn the focus ring until the Sharpness Indicator shows 100 %.
Tips#
To achieve better results, try the following:
- Use a target with high contrast and clearly-defined edges, ideally a test chart, e.g., the ISO 12233 test chart.
- Work with well-exposed images. Adjust gain and exposure time for optimum brightness. Alternatively, use the automatic image adjustment feature.
- Minimize noise in the image, e.g., by lowering the gain.
- If possible, use a large aperture, which corresponds to a low f/ number.
- Avoid scenes with good contrast at multiple distances from the camera. Adjust the ROI to select only the desired distance from the camera.
- After adjusting the ROI, click Reset in the Sharpness Indicator pane to reset the sharpness measurement to the new selection.
- Turn the focus ring slowly so the software can analyze as many steps as possible.
- While turning the focus ring, don't move the camera as this may negatively affect the sharpness in the image.
- Make sure that you complete one full turn of the focus ring before judging the results.